Use the Summary, Properties, and Inputs Windows
Summary Window
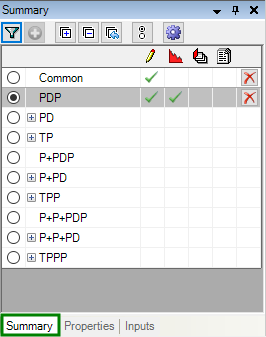
The Summary window is displayed below the Entity Explorer when you click the Summary tab in the bottom left corner of the screen.

The Summary window displays reserves categories or resource classes and the types of data in each of them for the selected entity. The four data types are described in the table below.
| Icon | Description |
|---|---|
 | User input |
 | Forecast data |
 |
Change records. You can remove this column in the summary panel options by clicking  . . |
 |
Economic data. You can remove this column in the summary panel options by clicking  . . |
 | Deletes all data (user input, forecast, change records, and economics) in the reserves category for the selected entity |
Configure the Summary Panel
You can configure the Summary window behavior to suit your workflow using the options below.
| Icon | Function |
|---|---|
 | Filters the list to only reserves categories or resource classes with inputs. |
 | Adds another reserves category or resource class. Active only when the filter above is active. |
 | Expands/Collapses the list groups. |
| When scrolling through entities, these buttons toggle between always displaying the first reserves category or resource class with inputs or always remaining on the currently selected reserves category or resource class. |
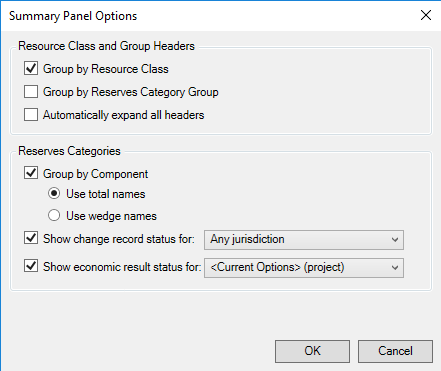
You can further configure the Summary panel display by clicking Options ( ).
).

To copy data between reserves categories, see Copy Reserves Category Data (and Advanced Copy).
Also seeDelete Reserves Category Data, and Hide or Move the Summary/Properties/Inputs Window.
Properties Window
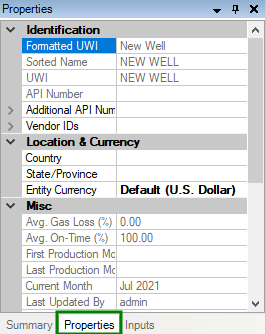
The Properties window is displayed below the Entity Explorer when you click the Properties tab in the bottom left corner of the screen.
The Properties window displays information for the entity selected in the Entity Explorer. Fields in bold text are editable. Keep in mind that changing some fields could affect the organization of the Entity Hierarchy. See Create or Edit an Entity Hierarchy .
Also see Hide or Move the Summary/Properties/Inputs Window.

Inputs Window
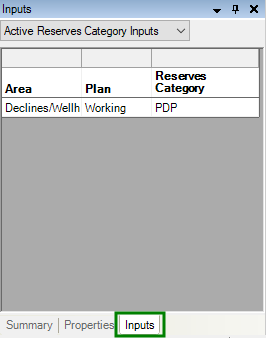
The Inputs window is displayed below the Entity Explorer when you click the Inputs tab in the bottom left corner of the screen.
Inputs are summarized for the current entity according to four views and organized by area (Declines, Interests, General Economics, Costs, etc.).

Select one of the following views from the list at the top of the Inputs window:
| View | Description |
|---|---|
| Entity | Displays all areas, plans, and reserves categories with inputs for the current entity. |
| Related Plans | Displays areas with inputs in the current plan or the current plan’s parent or child plans. |
| Active Reserves Category Inputs | Displays areas that have inputs in the current reserves category and plan. If an area is not listed, it either has no inputs or it inherits its data from another reserves category or plan. |
| Active Reserves Category Sources | Displays the source plan and reserves category for the inputs in the current plan and reserves category. |
Hide or Move the Summary/Properties/Inputs Window
You can hide or move the Summary/Properties/Inputs window by clicking the icons in the top right corner of the window, as explained in the table below.
| Icon | Description |
|---|---|
 | Hide: Closes the current window (Summary, Properties, or Inputs). Floating: The current window (Summary, Properties, or Inputs) is undocked from its default position. You can move it to another location or to another monitor. Auto-hide: The Summary/Properties/Inputs windows are hidden when not in use. A tab for each window appears to the left of the Entity Explorer. |
 | Causes the Summary/Properties/Inputs windows to be hidden when not in use. A tab for each window appears to the left of the Entity Explorer (same as clicking Auto hide, above). |
 | Closes the current window. |


